
The G1LRO USB Transceiver Model 50 is built around 2 discrete elements:
- AIOC Sound card and serial interface
- SA818 UHF transceiver module
Both of these need setting up individually before use.
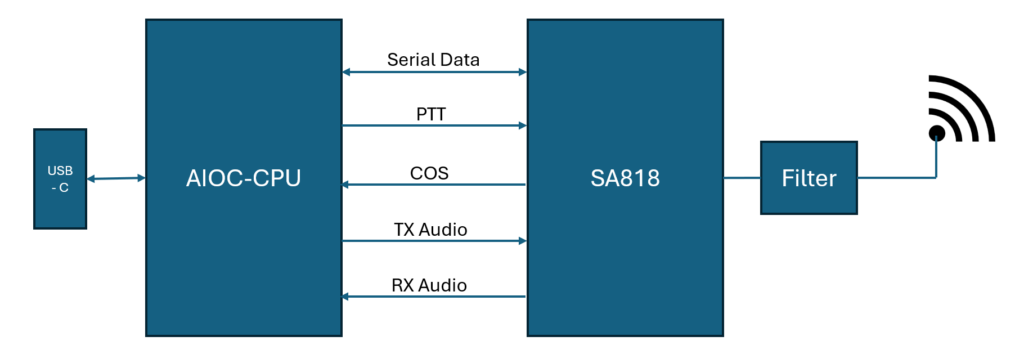
The setup process is :
- Flash the firmware into the AIOC processor
- Configure the AIOC processor for COS settings
- Configure the SA818 for the required frequency and CTCSS settings
- Configure ASL3 to easily recognize the AIOC processor.
All of these steps are executed via a PC and Web browser, no command line access is needed.
Step 1 : Flash AIOC Firmware
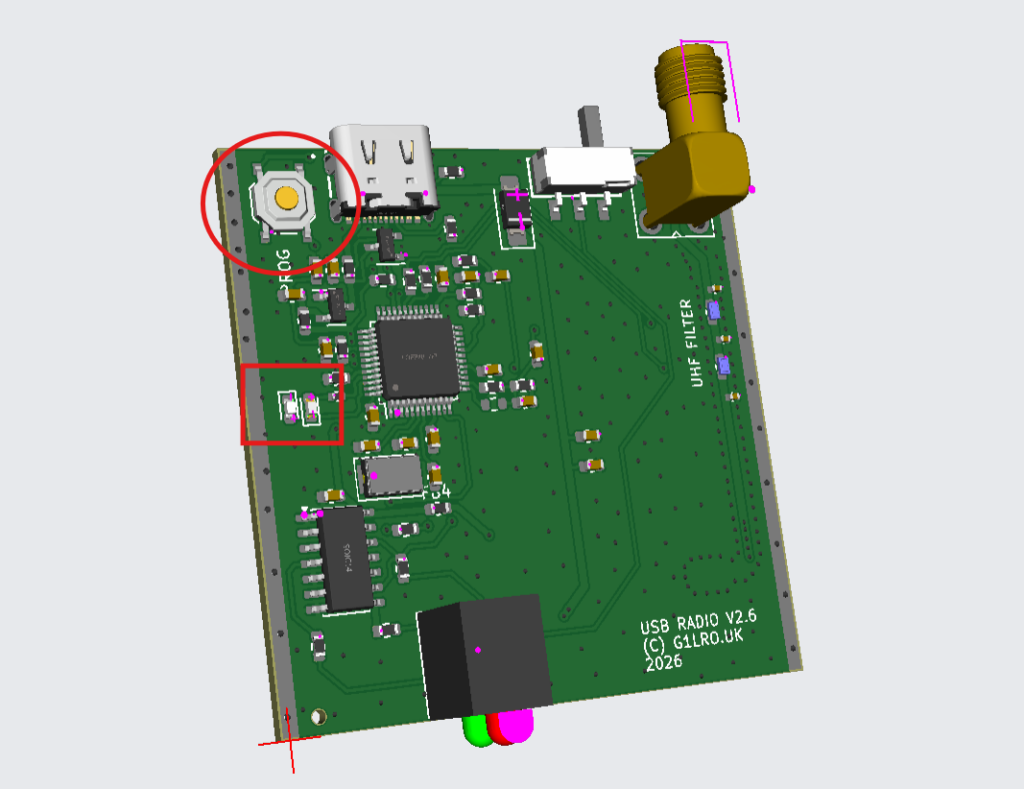
Remove the Model 50 PCB (two screws at the back) from the enclosure, locate the small button on the PCB (circle on the picture below)
Connect the Model 50 PCB to the PC via a USB cable, hold the button down whilst plugging-in. The two small LEDs on the main board will not light when this is done (these are in the square in the picture below).
Download AIOC Firmware file:
https://github.com/skuep/AIOC/releases/download/v1.4.1/aioc-fw-1.4.1.bin
Browse to web-based software loader:
https://devanlai.github.io/webdfu/dfu-util/
Click connect in the browser
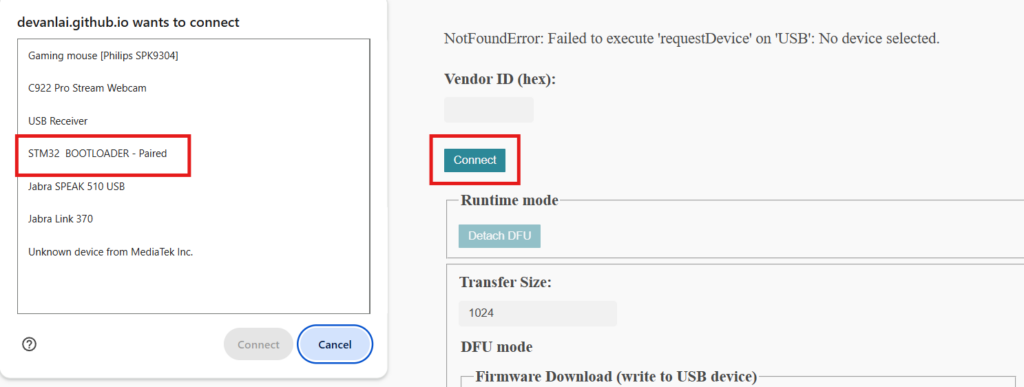
Select the device STM32 Bootloader then Internal Flash
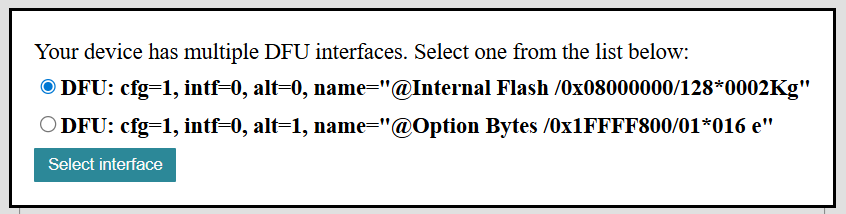
Choose the AIOC firmware file previously downloaded and click download
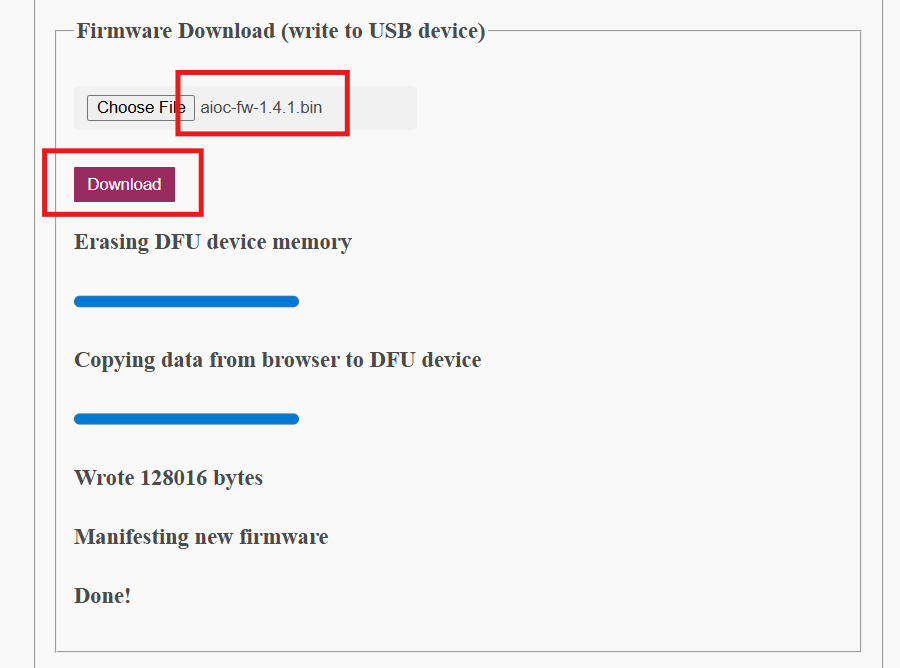
Disconnect Model 50 PCB from USB after flashing.
Plug the USB back into the PC and the two LEDs on the board will blink to show the firmware is property loaded.
Step 2 : Configure the AIOC CPU
The Model 50 needs to use hardware COS, here we tell the AIOC firmware which COS method to use.
- With the Model 50 PCB plugged into your PC or laptop
- Browse to: https://g1lro.github.io/aioc-util/
- Click Connect and select the AIOC device.
- Enable Hardware COS and click Apply.
- Scroll down past the status pane and click Store to Flash.
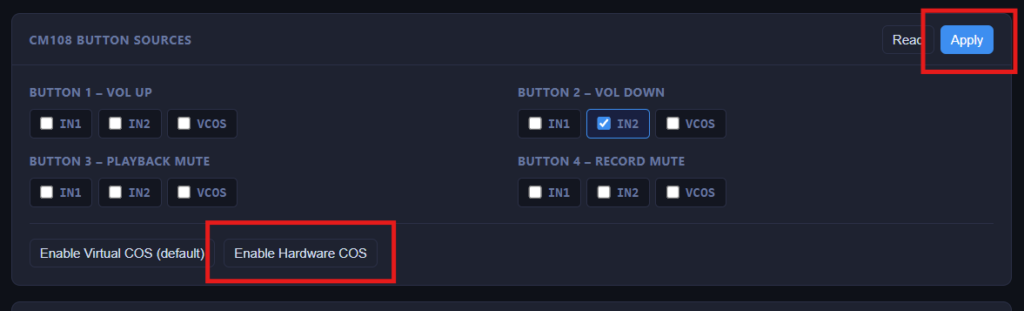

Don’t miss Store to Flash! It’s tucked below the status display and easy to overlook. Settings that are only applied but not stored will be lost the moment the AIOC is unplugged.
You can now reassemble the Model 50.
Step 3 : Configure the SA818 radio module
The Model 50 is plugged into your PC
Browse to: https://f8asb.github.io/sa818/
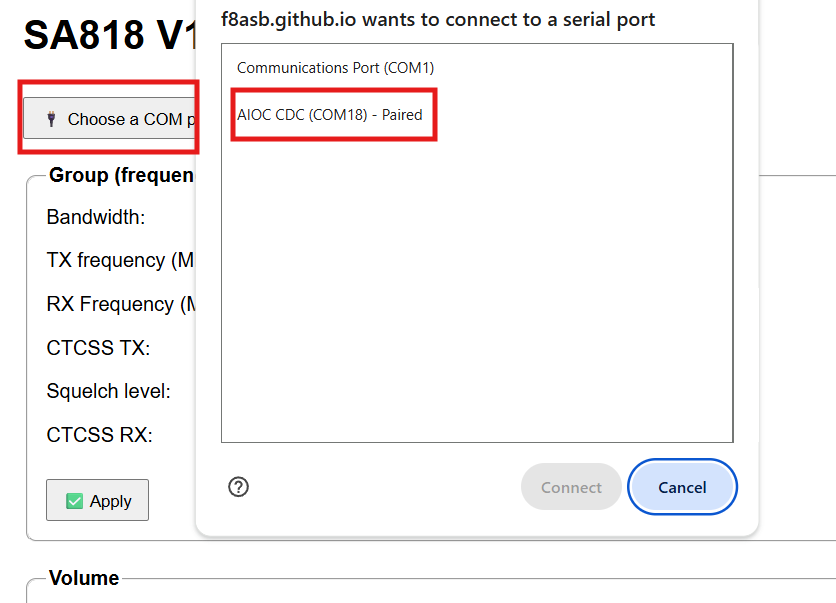
Then click on “Choose a COM port” and select the AIOC in the list.
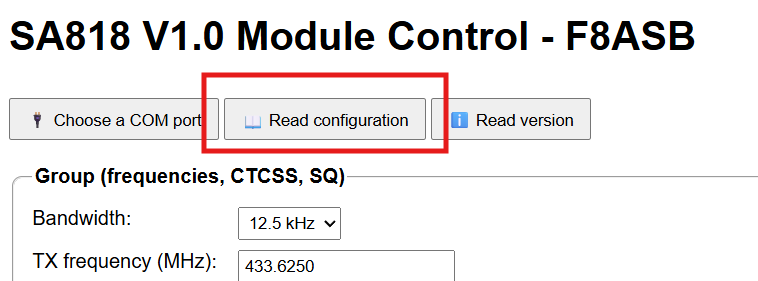
Click the Read Configuration button to load the config from the radio module:
Next set the frequency and CTCSS settings you wish to use.
Note you need to enter the 4 digits after the decimal point for the setting to work so for 433.625MHz you need to enter 433.6250.
Set the squelch to a low level and the volume to the max level.
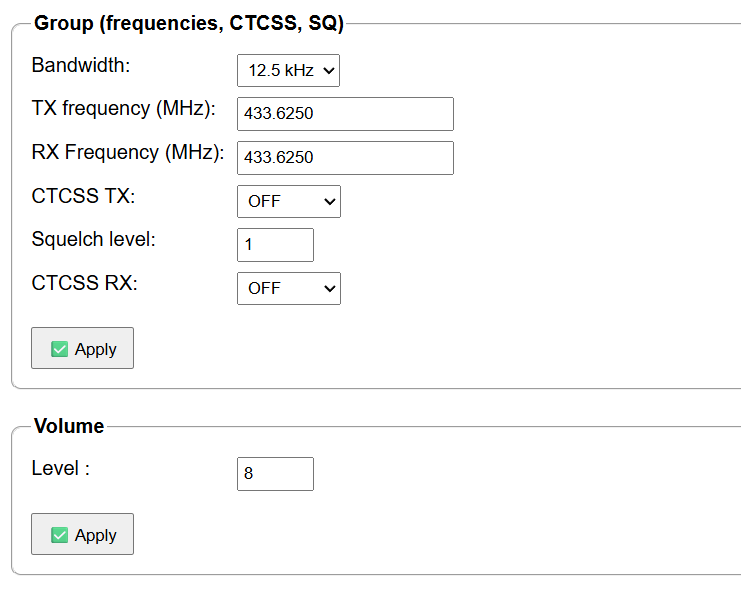
Click Apply after making changes in each section.
A log at the bottom of the screen shows success for each ‘Apply’
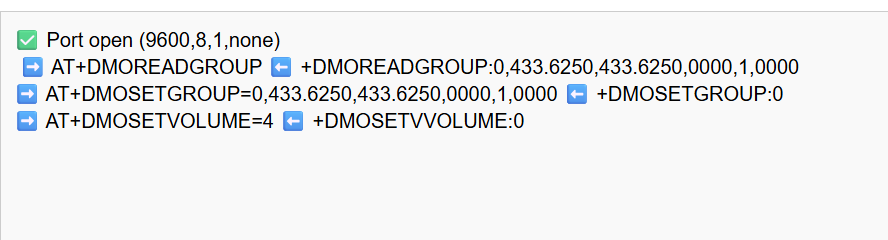
Your HT and SA818 settings must match
When you key the HT, the COS LED will light on the Model 50 if frequency and CTCSS settings on the HT and the SA818 match. If the COS LED does not illuminate, check the HT settings and the SA818 config as described above.
Step 4 : Configure ASL3 for the AIOC CPU
Assuming you have a fully configured ASL3 node, log in to the ASL3 terminal on the ASL3 server (via the web admin portal or SSH) and (copy/paste) run these two commands:
wget -O customize.sh https://raw.githubusercontent.com/G1LRO/AIOC-ASL3-Config/main/customize.sh

sudo bash customize.sh
That’s it. The script handles everything, here is a list of the changes made:
| Step | File | What it does |
|---|---|---|
| 1 | res_usbradio.conf | Enables the AIOC USB device (1209:7388) |
| 2 | Asterisk | Restarts so the AIOC is recognised immediately |
| 3 | simpleusb.conf | Sets correct PTT, COS, and CTCSS settings |
| 4 | rpt.conf | Sets half duplex mode |
Timestamped backups of all modified config files are created before any changes are made.
Full details of this script are at: https://github.com/G1LRO/AIOC-ASL3-Config
Step 5 : Tune the ASL3
Have an HT or other radio tuned to the same frequency and CTCSS as the Model 50 settings.
On the ASL3 server, open a terminal (or use SSH) and run the followng command:
sudo simpleusb-tune-menu
Work through the tune menu:
| Option | What to do |
|---|---|
| V | Verify COS — key the node HT and confirm COS opens; unkey and confirm it closes |
| e | Echo test — transmit to the Model 50, you should hear yourself played back |
| 2 | Set audio levels |
| W | Write settings when everything sounds good |
Audio level tip: The SA818 should be on max volume and experiment with the Filters settings to get a level you are happy with.
That’s it. the Model 50 Transceiver is ready for use!