Add a low cost $5 display unit to any Raspberry Pi running ASL3 and gain real-time status and a simple node control menu.
The RLN-Z2 is not yet in production.. watch this space.
What you’ll need:
This software is designed to work on the AllStarLink v3 image it’s unlikely to work on the Hamvoip setup. (The AllstarLink3 software V19 is not working, use an earlier version)
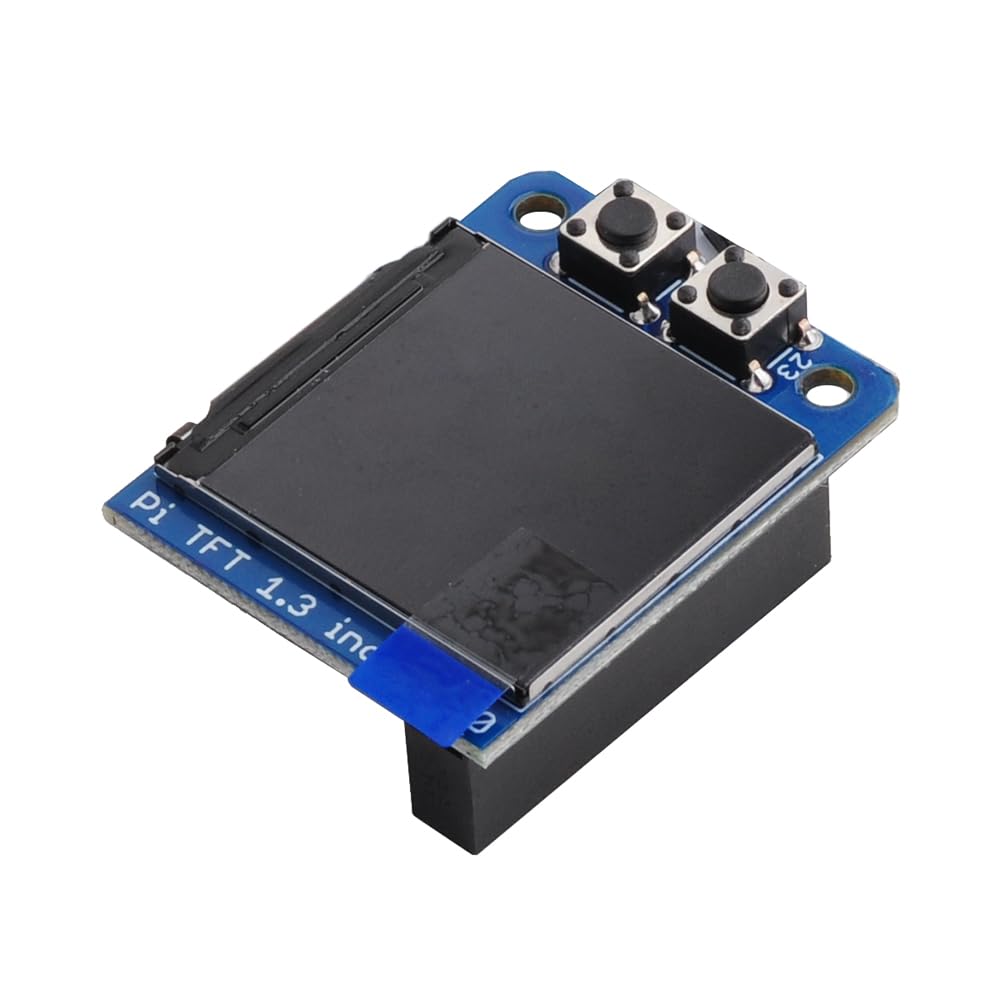
You’ll need the LCD/Button combo from Adafruit, Amazon or AliExpress, this is a 240×240 pixel 1.3″ display with two action buttons.
AliExpress Link: https://www.aliexpress.com/item/1005001746881831.html
Adafruit Link: https://www.adafruit.com/product/4484
If these links aren’t working anymore then search for “Raspberry monitor Mini PI TFT DA 1.3 240×240“. Basically any screen that looks like this one in these pictures will probably work.
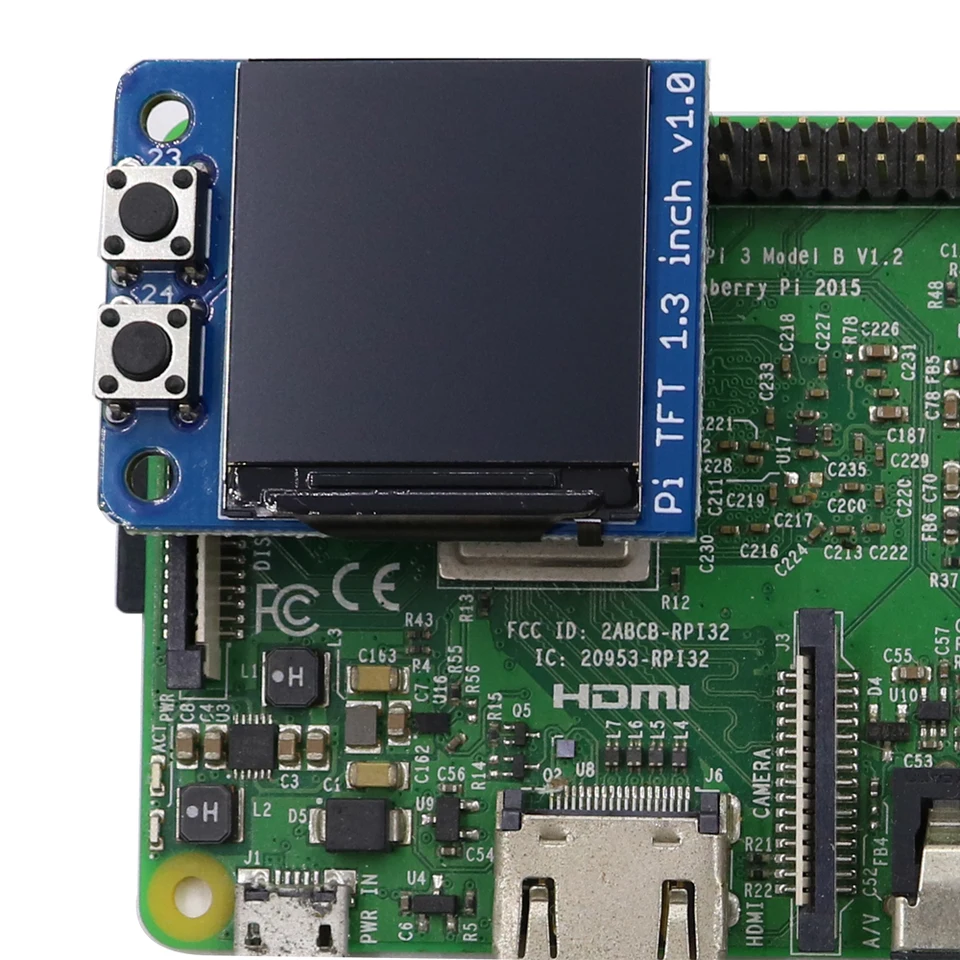
The display plugs onto the raspberry Pi Header on any Pi version. When you have a display, plug into the left-hand end of the header as shown above. You are now ready to install the software.
Installing the software:
Go to the terminal prompt on your AllStarLink node in the Web Admin Portal.
Enter the following three commands:
wget https://g1lro.uk/installdisplay.sh.sh
chmod 777 installdisplay.sh
./installdisplay
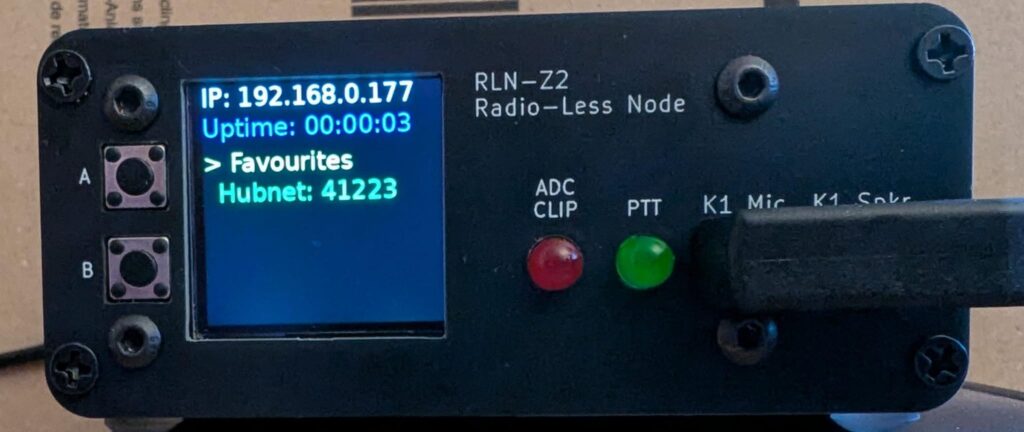
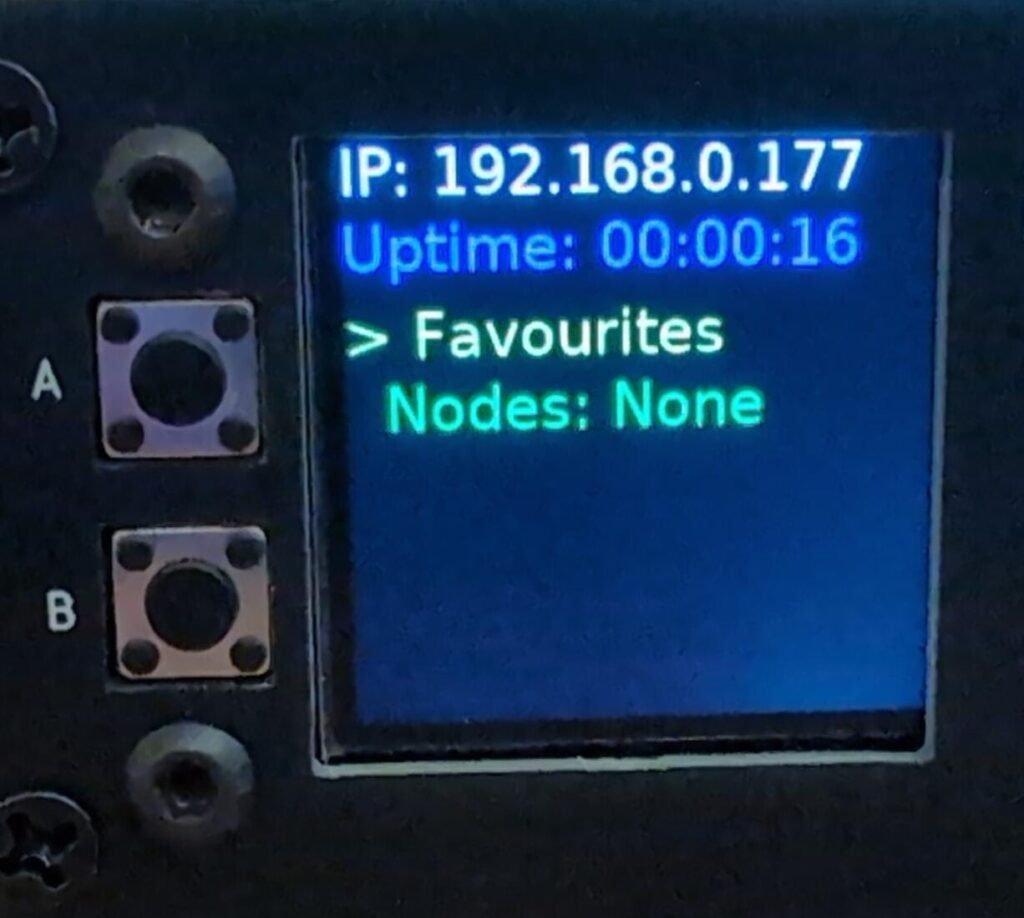
It can take a few minutes to complete depending on the amount of updates your Pi needs, but once it’s done you’ll have your screen showing node information like on the image at the top of the page.
The display menu will not work until you have edited the favourites.txt file.
The Uptime measurement is DD:HH:MM
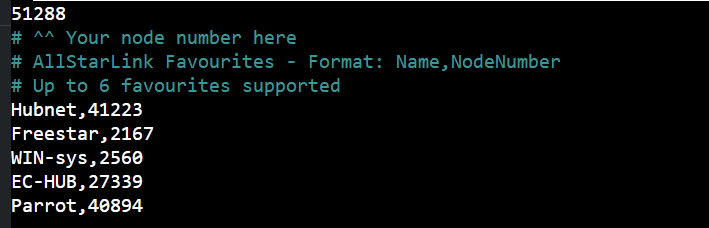
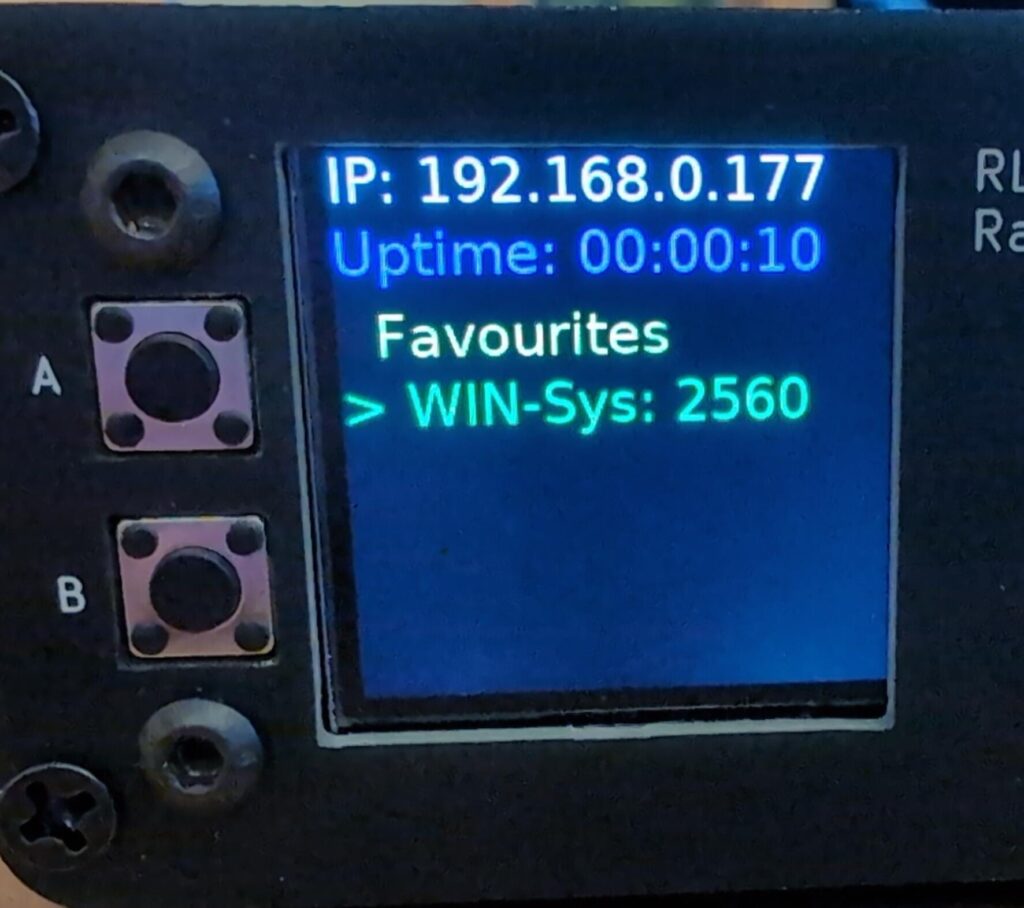
Favourites File
The favorites file is a simple text file with your node number, and up to 6 of your most commonly connected nodes that will be accessible from the menu on the screen.
Edit the file with the following command at the prompt:
nano favourites.txtIn the file you see the default entry (hubnet, parrot etc.)
Importantly you need to edit this file to include your node number (change the 99999 entry).

then, simply add new entries by putting a friendly name of up to around 8 characters (so it fits on the screen) followed by a comma, then the node number:
Do CTRL-X then Y to save the file.
Reboot the ASL node to read the new favourites file, (this happens on startup), type this command to reboot:
sudo rebootThe menu software will automatically load each time the Pi boots up.
Navigating with the buttons.
Due to a slow display driver the software can lag a bit, so be patient and use long presses, maybe up to 1 second
There are two buttons:
- The top (A) button moves around the screen to select things.
- The bottom button (B) acts on the selection.

Demonstration video of the control panel and RLN-Z2
Updates and improvements
I have released this software as open-source on GitHub. Feel free to modify and enhance it, please do contribute back to the main code any interesting updates and bugfixes, so everyone can enjoy the enhancements. Also please report issues there too:
https://github.com/G1LRO/ASL-Display
When there’s a good release software update, I’ll update the download on this web site so everyone can have the new version by default.