1) Removing existing front panel and making LED diffusers
For early V2.2 URC units, removing the existing front panel requires de-soldering the solder bridges under the main board, then pulling away the panel from the main board.

Only if needed, carefully remove the speaker from the old front panel with a blade or spudger, trying to keep the self adhesive surface in-tact. Don’t pull it off, it’ll disassemble.
2) APRS Board Installation
When you solder the BluePill micro controller, you only need to solder the pins marked with white blobs (or you can solder them all).

Solder the speaker leads to the APRS board and when the unit is finally assembled, use the self-adhesive fixing to attach the speaker to the new front-panel (don’t do this until the APRS board is fully installed).
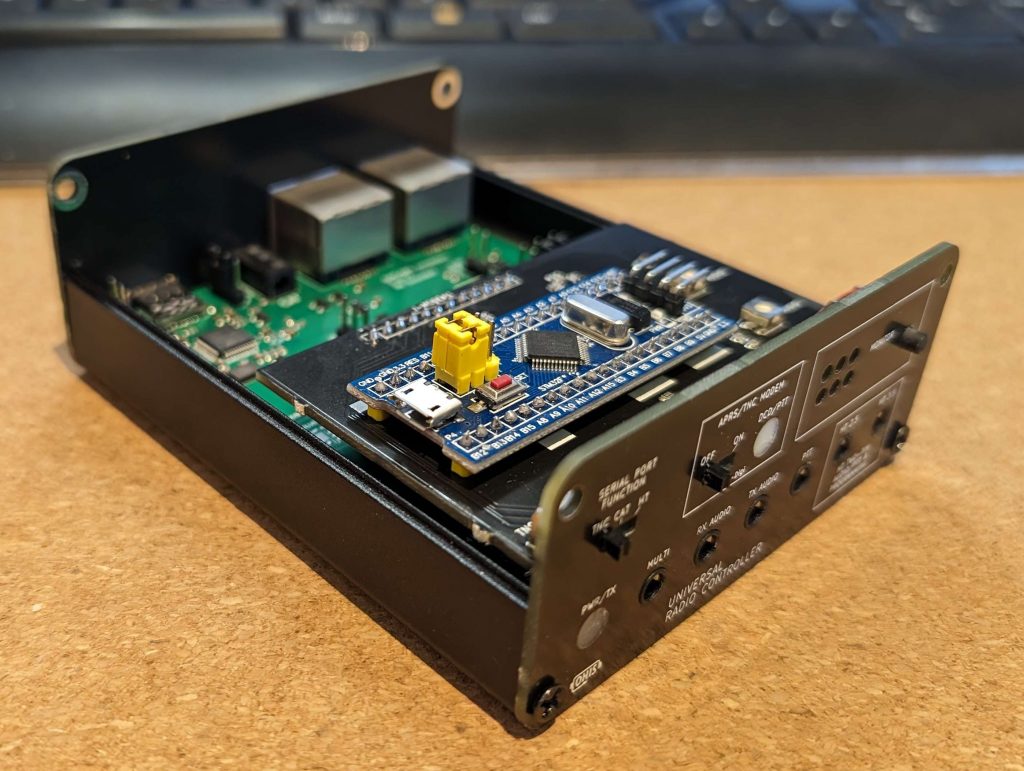
You’ll need to solder the 12 pin header into the APRS board (try to make sure it’s vertical), it’s best to do this with the APRS board in-situ in the case.
NOTE: the long BluePill pins can descend too far and interfere with the main board jumpers, check and cut the pin 1 after assembly. (you’ll see what I mean if you test-fit the board ).
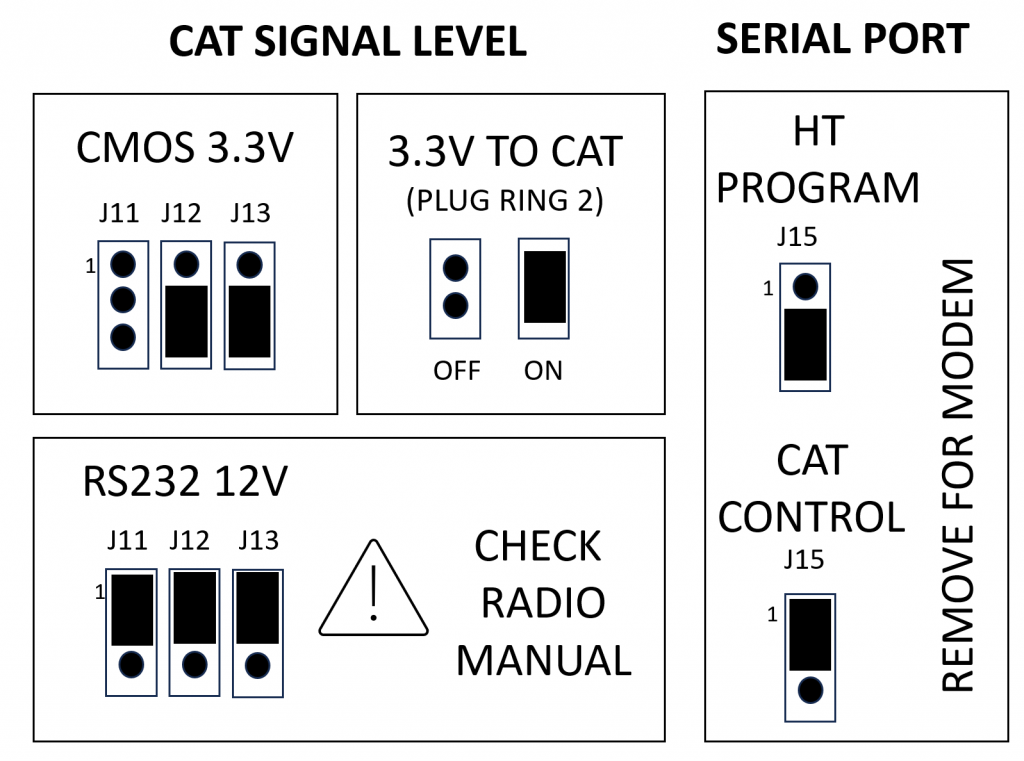
On earlier URC models, remember to remove J15 on the main board to allow the front panel switch to select the serial port function (later models have this removed and the J15 pin header is not installed).
3) Using the VP-Digi board
The VP-Digi board is connected to the URC serial port via the front panel switch. Select the TNC position to enable the serial port.
There is a separate power switch for the VP-Digi, the center position of this switch is not used, so move to the right for ‘on’.
When you power up the VP-Digi and connect by a terminal program e.g. PUTTY, you will not see any text. Type the word ‘config‘ to enter configuration mode.
How-to guides are available here:
APRS Board How-to 1: Set-up and configuration
APRS Board How-to 2: Setting up an APRS Digipeater
You can use a second USB cable plugged in to the BluePill board to monitor operation, but you’ll need to leave the lid off the URC. When you are familiar and have a stable setup, this won’t normally be required.